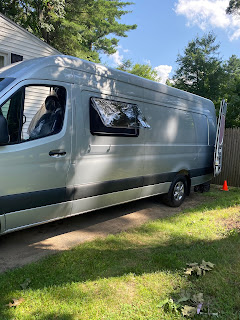
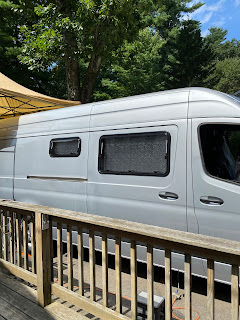
The scariest cut of all - making holes for the windows!!
*
And so it has begun.
On July 1st, we took possession of our new van, a Mercedes Sprinter on a 170" wheel base with an extended body. Our total length is 24.5 feet, a dramatic increase from our 19 foot Roadtrek Agile (also a Sprinter chassis)!
Tim had already put months of work into this project - researching electrical, solar, plumbing systems, designing the layout, and creating a spreadsheet with all the needed parts (with links and costs). Once we decided to move forward with up-fitting a new van ourselves he began ordering parts, pre-assembling the internal systems and testing them..... over and over. The back porch has become the "workshop" and storage facility for windows, water/waste tanks, radiant floor panels, hoses, generator ....... and the roof has been the testing ground for 6 solar panels which are currently running a small fan as well as the new refrigerator for the van.
Over the past 25 extremely HOT days we have been working non-stop. So far most of all the work has truly been the grunt, totally non-sexy part of the up-fitting. Yup, all the stuff that, ultimately, will never be seen - but are essential to how we want to travel.
This is where our story begins.......
*
Step 1
Remove the wall panels that the van came with.
Apply the sound dampening material.
Vans are a whole lot of metal speeding down a highway. When they go over bumps the metal rattles. And rattles are super annoying.
These Noico Solutions panels come in fairly large @ 18" x 29" sheets that can be easily cut with a scissors. They have a self adhesive back and we used a small metal brayer to firmly attach the panels to ALL the interior walls, ceiling and wheel casings. (Note: At this point we did not do the 5 sections where we will be adding windows. We will complete those spots after the windows are in)
This was a tedious job but once we found our groove it went fairly quickly. We also began adding the next 2 layers of insulation (steps 2 and 3) as we completed each side of the van.
Tim using a brayer to secure the Noico panel
*
My job was, mostly, measuring and cutting ......
*
Step 2 and 3
Apply Reflectix - a double reflective insulation and Foamular Insulation Sheeting.
On top of the sound deadening panels we added two layers of insulation. This will help keep our traveling Pod cool in hot climates and warm in cold climates! Strangely enough we have found ourselves traveling to many cold areas and have often awoken to below zero temps and a few frozen pipes. Yeah .... not great.
Which brings me to an important piece of info about Tim's plan for our new Pod. Most upfitted van units place the holding tanks under the chassis and run all the water lines in the outside walls of the van. (I bet you can already see the problem.) This is NOT how Pod 3.0 is going to do it! Everything will be inside our layered and cozy interior! More on that when we actually get to installing all the cool things that Tim has been diligently testing on the porch .........
Back to the grunt work.
Both the Reflectix and the Foamular sheeting had to be cut to size to fit in all the nooks of the van walls. Each layer was glued into place using Loc-Tite construction adhesive. We then filled any remaining spaces and cracks with Great Stuff spray foam. Once the foam was completely set/dry (@ 24 hrs) it was trimmed to be flush with the final insulation layer.
Reflectix and the Foamular sheeting process
*
Ceiling completed!
*
Nothing to see here!
*
Once all the insulation was completed we put the original wall panels back in place. The walls are now ready for their next layer ..... but first the windows need to be installed.
This was by far the scariest (for me) part of this whole deal - cutting holes in a brand new van!! I mean its not like you can "stitch witchery" it back together. I truly wanted no part of this process but Tim insisted that "we're in this together, if we fail we fail together." (Yeah... something like that.)
And we did it together!
And we are still speaking!
And we currently have 3 windows installed!!
the first cut is the deepest....
Creating the first template (we will have 3 different sizes) was a bit nerve wracking - like creating a costume pattern that has to be perfect on the body the first time it is put on. Ugh. We started with the smallest of the windows - which will sit above the galley counter. Our first window took us approximately 5 hours to put in.
First window completed.
Once the hole is cut a frame is constructed on the interior of the van - this is to both support the window as well as make it flush with the finished wall. The frame is constructed of laminated PVC boards and attached to the wall with 3M VHB (Very High Bonding) double sides tape.
Attaching the frame.
*
Our windows are Arctic Tern manufactured by Tern Overland and supplied to us by campervan-hq.com. They are made in Europe and feature double pane acrylic glazing and include a separate interior cover panel containing a retractable screen on top and a black out shade with a reflective exterior on the bottom.
Arctic Tern windows with retractable screens and
blackout blinds.
*
Open window on driver's side
*
Sliding door and Galley windows
*
We are taking a break before adding the last 2 windows - because they won't be here until next week.


